Set up stage 1: The Configuration Assistant
The first time you start Sage 200 or create a new company, the Configuration Assistant is displayed to guide you through the initial setup.
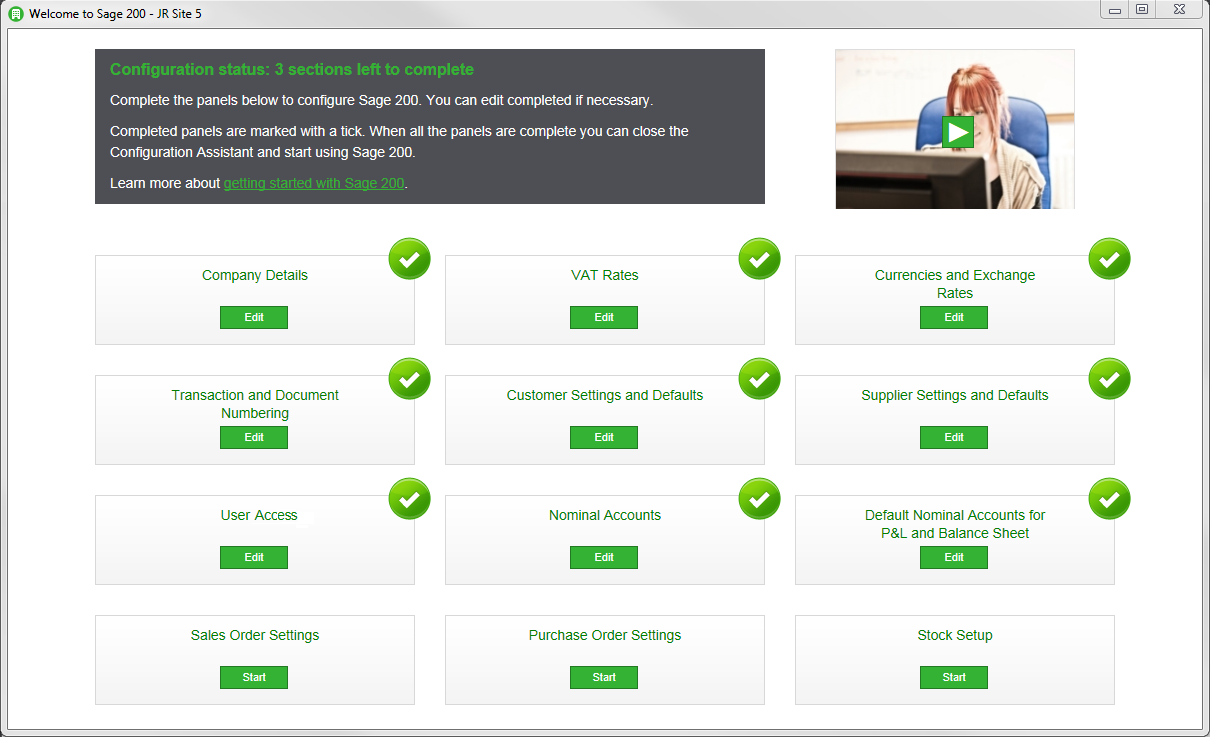
To complete the assistant, you need to choose your settings in each of the panels and mark them as complete.
Watch a video
Configuration assistant (video)
Information you need before you start
Before you start, you'll need to gather some information to help you set things up.
The topic below will guide you through what information you need to collect, and what decisions you will need to make.
Don't worry if you do not have all the information to hand right now. You can always change things after closing the Configuration Assistant.
Enter your settings
To enter your settings:
- Click Start to enter the settings for a panel.
-
Choose the required options for that panel.
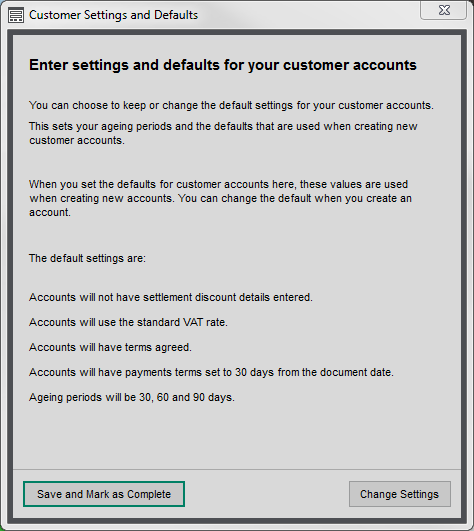
Some panels will have default settings, which we have set for you to get you started. These panels will give you a summary of the default settings.
You can save and use these defaults, or you can choose your own by clicking Change Settings.
Note: For details on default settings, see Default settings you can accept or change.
- After choosing your settings on a panel:
If you haven't yet finished, click Save to keep your settings.
You can return to this panel by clicking Continue.
If you've finished this panel, click Save and Mark as Complete.
A green tick will show that you've completed this panel. You can still come back and change settings in this panel by clicking Edit.

If you want leave without saving, click Close.
- Once all the panels are marked as complete, you can close the Configuration Assistant and start using Sage 200.
Tips
- You can change the settings on any panel, even panels marked as complete.
- You can close the Configuration Assistant at any time, and continue where you left off the next time you start Sage 200. Just remember to click Save or Save and Mark as Complete to save the information.
- Complete the panels in any order, but you will need to complete the Nominal Accounts panel before you open Default Nominal Accounts for P&L and Balance Sheet.
- If you don't need to enter information on a particular panel because it's not relevant to your business, or you're happy with the defaults, click Save and Mark as Complete.
Default settings you can accept or change
You have 12 accounting periods set to calendar months.
Your company will have the following VAT rates.
| Code | Name | Description |
|---|---|---|
| 0 | Exempt | Exempt from VAT. Set at 0%. |
| 1 | Std Rate | The current Standard VAT rate. |
| 4 | EC Zero SL | EU zero rated sales of goods and related services. |
| 5 | EC Service | EU sales of non-related services. |
| 6 | EC Service | EU purchase of non-related services. |
| 7 | EC Zero PL | EU zero rated purchase of goods and related services. |
| 8 | EC Std PL | EU standard rate purchase of goods and related services. |
Three currencies have been set up for you:
- Pound Sterling.
- Euro.
- US Dollar.
Your base currency is set as Pound Sterling.
The exchange rates are set to 1.
Sets up a Chart of Accounts typical to most businesses. A quick way to create nominal accounts is to use these and edit them to suit your business.
- Click Use a set of nominal accounts provided by us. The nominal accounts are shown in the list.
- You can change the Name, CC, Dept or Report Category.
This gives you a sample of a Chart of Accounts that you can use to get you started. You add more accounts now once you've completed the configuration assistant.
- Check you selected Academy on the Company Details panel.
- Click Use a set of nominal accounts provided by us. The accounts are displayed in the list. You can make changes as required or import additional accounts. You can change the Name, CC, Dept or Report Category or SOFA category.
If your LEA has provided us with the Chart of Accounts that you're required to use, this option will appear: Use a set of nominal accounts provided by your LEA.
This populates the list with the accounts. You change these or add new accounts as required.
The starting number for transactions, journals and document numbers is 1.
When you create new customer accounts:
- There are no settlement discount details.
- They use the standard VAT rate.
- You have agreed terms.
- Your payment terms are set to 30 days from the document date.
- Your ageing periods are 30, 60 and 90 days.
When you create new supplier accounts:
- there are no settlement discount details.
- They use the Standard VAT rate.
- You have agreed terms.
- Your payment terms are set to 30 days from the document date.
- Your ageing periods are set to 30, 60 and 90 days.
- You will pay all invoices using a single payment method (group).
The user set as the Customer Operations Agent (Operator) in Sage Provisioning Portal, is automatically given Administrator access in Sage 200. This allows access to every screen in Sage 200, as well as the Configuration Assistant.
Other users won't have access to any screens until you assign access for them.
- Your selling prices exclude VAT.
- You can record payments with your sales orders.
- You can generate purchase orders from your sales orders (back to back orders).
Your stock items are all stored in a single HOME warehouse.
Your stocked unit is Each.
Completing the Configuration Assistant
When you have marked all the panels as complete, you are ready to close the Configuration Assistant and start using Sage 200.
Remember, you can't change your financial year after you finish the Configuration Assistant.
We recommend that you have one last check to make sure that you are happy with your settings, then:
-
To complete the assistant, click Close Configuration Assistant and start using Sage 200 at the top of the page.
-
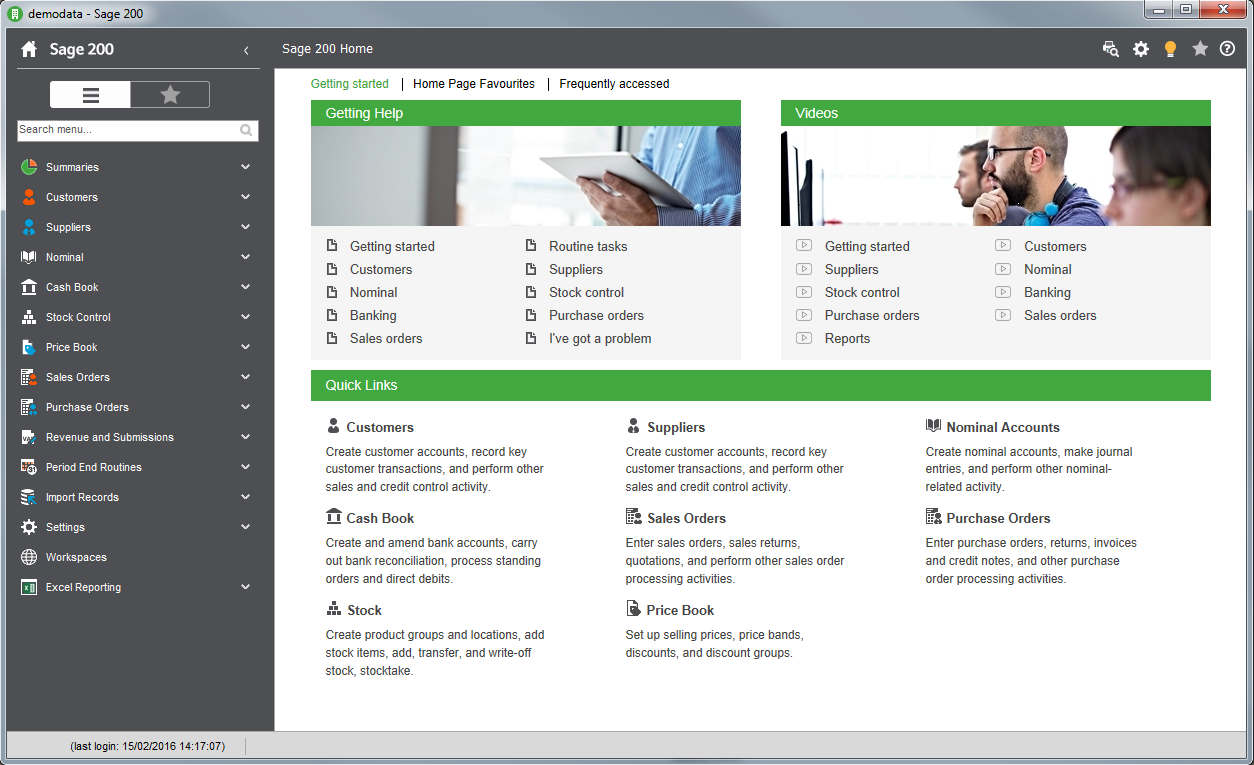
You will then see the Sage 200 home page.
-
You can now:
Making changes once you have left the Configuration Assistant
Once you have completed all the panels on the Configuration Assistant and moved into the main Sage 200 workspace you cannot go back into the Configuration Assistant.
Having said that, you can update most of the information you specified with Sage 200.
What you can't change
Some of the details you provide on the Configuration Assistant cannot be updated once you start processing so it is important you capture these correctly.
| Panel | Field | Rule |
|---|---|---|
| Company Details |
Financial Year:
|
You can only amend this month and year on the Configuration Assistant. Once you save the details of your financial year and close the Configuration Assistant you will not be able to update this information. Remember that you cannot post transactions before the specified financial year start date. |
| Invoices and Sales Orders |
Prices include VAT (Yes or No) |
You can amend this setting up until a sales order, quote or pro forma is saved. |
| Currencies & Exchange Rates | Base Currency | You can amend this setting up until a transaction is posted. |
What do you want to do?
- Complete the Company Details panel
- Complete the VAT Rates panel
- Complete the Currencies and Exchange Rates panel
- Complete the Transactions and Document Numbering panel
- Complete the Customer Settings and Defaults panel
- Complete the Supplier Settings and Defaults panel
- Complete the User Access Panel
- Complete the Nominal Accounts panel
- Complete the Default Nominal Accounts for P & L and Balance Sheet panel
- Complete the Invoice and Sales Orders Settings panel
- Complete the Purchase Order Settings panel
- Complete the Stock Setup panel


