Invoice and sales order settings and defaults
Find this screen
Open: Settings > Invoicing and Sales Orders > Invoice and Order Settings
How to
Change your settings
These settings determine how orders and invoices can be processed.
To change the settings, click Edit.
Note: If you can't see the Edit button, then you don't have access to edit the settings. If you need to change settings, speak to your System Administrator.
Choose your settings on each tab:
-
Document numbering.
Set the starting number to be used for the next purchase order, return, quotation, pro forma, despatch note, invoice, or credit note.
-
Invoice and Order Entry.
Choose whether to use VAT inclusive or VAT exclusive prices on your invoices and orders.
Choose how to process payments.
Choose generic customer accounts to use for one-off sales and potential customers (prospects).
-
Sales Assistance.
When you enter a full sales order or quotation, you can add other items that the customer might be interested in buying.
- Use Suggested items to see items that are specific to the customer. These include the customer's preferred items (you can think of these as 'favourites'), and items that the customer has recently ordered and frequently ordered.
- Use Cross-selling items to see items that are often sold together with an item you've added to the order or quotation. For example, if you sell a printer, you might want to show print cartridges or cables for that printer.
-
Printing and Tracking.
Choose whether to print despatch notes when goods are despatch with sales orders.
-
Invoice Printing.
Choose the text that you want to print on some types of invoice.
-
Intrastat.
Set up Intrastat options for sales orders.
Document numbering
These settings can be used by both the Sales Orders and Invoicing modules.
Open: Settings > Invoicing and Sales Orders > Invoice and Order Settings | Document Numbering.
You can set the starting number to be used for the next purchase order, return, quotation, pro forma, despatch note, invoice, or credit note.
Changing the numbering will not affect the numbering of any existing documents, it will only apply to subsequent documents that you create. Each time that a new document is created, the document number will be incremented by 1.
You can only use numbers in the reference (characters 0-9).
When you create a sales order or return, the document number will be displayed.
Note: Invoice and credit note numbers are used by both the Sales Order and Invoicing modules.
Use stock and/or free text lines
These settings can be used by both the Sales Orders and Invoicing modules.
Open: Settings > Invoicing and Sales Orders > Invoice and Order Settings | Invoice and Order Entry.
You can choose to restrict the kind of lines that can be added to invoices and orders. You might want to do this if you're not using stock items (standard items), as this removes the Stock line type from the invoice and sales order screens.
-
Standard items only: Free text lines won't be available when entering invoices and sales orders.
-
Free text items only: Stock item lines won't be available when entering invoices and sales orders.
-
Both standard and free text items: You can enter both types of line.
Note: You can't add free text lines to Rapid entry or Trade counter entry sales orders. You can change these to full orders by selecting the Full Order Entry button when entering one of these types of order.
Payment with invoices and orders
These settings can be used by both the Sales Orders and Invoicing modules.
Open: Settings > Invoicing and Sales Orders > Invoice and Order Settings | Invoice and Order Entry.
You can choose to record the receipt of a payment at the same time as entering an order or invoice. This is useful if your customers pay when goods are ordered. If you never take payments with orders then you don't need to turn this on.
-
Allow payments to be recorded during invoice and order entry - select this to turn on the payment options. This adds a payment tab to the order entry screen.
Note: Used by both Sales Orders and Invoicing.
-
Invoice payment with sales order immediately - Choose this to make this option selected by default on the Payment with order or tab. You can change this on individual orders if you need to.
Note: Used by Sales Orders only, and not by Invoicing.
-
Enable card processing - Allows you to enter card payments using Opayo (formerly Sage Pay). Once selected an Online card payment option is added to the Payment Methods.
Note: Used by both Sales Orders and Invoicing.
Changing this:
These can be changed at any time. Once changed the new settings only affects subsequent invoices and orders.
Pricing
These settings can be used by both the Sales Orders and Invoicing modules.
Open: Settings > Invoicing and Sales Orders > Invoice and Order Settings | Invoice and Order Entry.
You can change the settings you selected in the Configuration Assistant here, but once you save an invoice or sales order, pro forma or quotation, you cannot change whether your prices are inclusive or exclusive of VAT, so you should ensure you are happy with your choice before proceeding.
You must choose whether your selling prices are inclusive or exclusive of VAT.
Choose whether to use VAT inclusive or VAT exclusive prices on sales orders and invoices. This determines how prices are calculated.
-
Prices exclude VAT: VAT is added to the item price. For example, an item has a selling price of £100 and VAT is 20%. When this item is added to an order or invoice, £20 VAT is added making the total value £120.
-
Prices include VAT: VAT is deducted from the item price. For example: An item has a selling price of £100 and VAT is 20%. When this item is added to the order or invoice, the VAT is deducted from the selling price making the total value £83.33, after deducting £16.67 VAT.
How you choose to apply VAT may depend on whether the items you sell are exempt from VAT. For example, VAT inclusive pricing may be more suitable if you sell to the public and include VAT in your prices.
Once set, this setting applies to all orders and invoices.
Note: Used by both Sales Orders and Invoicing.
Changing this:
This setting can only be changed if all of your sales orders and invoices have a status of Complete. You can't change this setting if you have any sales orders and invoices with a status of Live or On Hold.
Set accounts for cash sales and prospects
Open: Settings > Invoicing and Sales Orders > Invoice and Order Settings | Invoice and Order Entry.
-
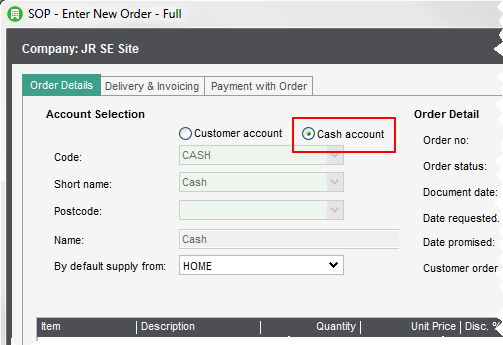
The cash account account is a generic customer account that you use to record cash sales for one-off customers, so you don't have to create individual accounts for these customers.
Note: Used by both Sales Orders and Invoicing.
-
The prospect account is a generic customer account that you use to record quotes or pro formas for prospects (prospective customers), so you only have to set up a customer account when the customer makes a purchase.
Note: Used by Sales Orders only, and not by Invoicing.
Do not use the same customer account for both the cash account and prospect account, as these are used for different purposes.
Set up and use a cash account
Set up and use a prospect account
Sales Assistance
These settings are used by the Sales Orders module only, and are not used by Invoicing.
When you enter a full sales order or quotation, you can add other items that the customer might be interested in buying.
- Use Suggested items to see items that are specific to the customer. These include the customer's preferred items (you can think of these as 'favourites'), and items that the customer has recently ordered and frequently ordered.
- Use Cross-selling items to see items that are often sold together with an item you've added to the order or quotation. For example, if you sell a printer, you might want to show print cartridges or cables for that printer.
Use this to see items that your customer orders regularly from you as Suggested Items.
Open: Settings > Invoicing and Sales Orders > Invoice and Order Settings.
- Move to the Sales Assistance tab.
- Select Use frequently ordered items.
-
Choose the default settings to use when showing frequently ordered items.
You can specify how items are counted as frequently ordered. You can choose to only include items within a particular date range (up to 365 days), and when they've been ordered a minimum number of times. For example, you could show items in the last 30 days that have been ordered at least 2 times.
These settings are just the defaults, so they can be changed when you view Suggested Items.
- When this option is enabled, the Frequently Ordered Stock Items option will be displayed when you view Suggested Items.
Use this to see items that your customer orders regularly from you as Suggested Items.
Open: Settings > Invoicing and Sales Orders > Invoice and Order Settings.
- Move to the Sales Assistance tab.
- Select Use recently ordered items.
-
You can specify how items are counted as recently ordered, by selecting a particular date range (up to 365 days). For example, you could show items ordered in the last 30 days.
This setting is just the default, so it can be changed when you view Suggested Items.
- When this option is enabled, the Recently Ordered Stock Items option will be displayed when you view Suggested Items.
Use this to see preferred items that have been set for this customer in Suggested Items. You can think of preferred items as 'favourites' for a customer.
Open: Settings > Invoicing and Sales Orders > Invoice and Order Settings.
- Move to the Sales Assistance tab.
- Select Use preferred items.
- When this option is enabled, the Customer's Preferred Stock Items option will be displayed when you view Suggested Items.
Tip: To set preferred items for a customer, you can select Set as Preferred when adding a standard item to an order or quotation, or use Stock Control > Stock Records > Customer Preferred Items.
Use this if you want to add cross-selling items to a sales order. Cross-selling items are complimentary items which are often sold together with another stock item. For example, if you sell a printer, you might want to show print cartridges or cables for that printer.
Tip: You might want to set up your cross-selling items first, before you enable this option. Once you've finished setting up all your cross-selling items for your stock items, you can enable this option to start using cross-selling.
Open: Settings > Invoicing and Sales Orders > Invoice and Order Settings.
- Move to the Sales Assistance tab.
- Select Allow users to select items for cross-selling.
- When this option is enabled, a Save and Cross-sell button will be available when you add a standard stock item to a full sales order or quotation.
Note: To add cross-selling items for a stock item, amend the stock item and use the Cross-selling tab. See Cross-selling stock items.
Printing and Tracking
These settings are used by the Sales Orders module only, and are not used by Invoicing.
Open: Settings > Invoicing and Sales Orders > Invoice and Order Settings | Printing and Tracking
- Choose whether to print despatch notes when goods are despatched for sales orders.
-
To record tracking and shipping information when you despatch items in a sales order, enable Record tracking on despatch.
-
When you despatch an order, you will be prompted to add tracking and shipping information. For example, you can enter the courier, consignment number, Incoterm, reason for export, weight, number of pieces, and any notes for the shipment.
You can skip this step if there is no tracking information to add, or you are not ready to enter it during despatch.
To despatch an order item and record tracking information, see Record despatch of goods and services.
-
If you want to add or amend tracking and shipping information after you have despatched the order item, use Amend Tracking Information.
To amend tracking information, see Tracking and shipping information for a despatch.
-
Invoice printing
These settings can be used by both the Sales Orders and Invoicing modules.
Open: Settings > Invoicing and Sales Orders > Invoice and Order Settings | Invoice Printing
You can specify the following text to be printed on your invoices:
- Text to indicate that the invoice has been paid. This defaults to Paid in Full, but you can change it if you want to.
-
Text that's included on invoices that you produce for Opayo (formerly Sage Pay), Sage Invoice Payments, and GoCardless.
-
For invoices that contain EU zero rated sales, we supply a number of messages approved by HMRC that you that you can select from.
- If you use domestic reverse charge VAT rates, we supply a number of HMRC approved messages you can choose from.
Note: EU zero rated sales and domestic reverse charge options only apply if your company is registered for VAT in the UK, so if your company's country is not GB, you won't see these options on the screen.
Domestic reverse charge (mobiles)
This applies to using domestic reverse charge VAT rates, to prevent carousel fraud.
Open: Settings > Invoicing and Sales Orders > Invoice and Order Settings | Invoice Printing
If you use these reverse charge VAT rates on your invoices:
-
Select Apply domestic reverse charge VAT rules when printing invoice. This makes sure the appropriate processing is applied when printing the invoices.
-
Select one of the approved messages to print on the invoices from Print the following text on invoice/credit note when reverse charge is applied. The HMRC recommends that this text is included on invoices that are eligible for reverse charge VAT.
-
VAT Act 1994 Section 55A applies.
-
s55A VATA 94 applies.
-
Customer to account for the VAT to HMRC.
-
Reverse charge supply - customer to pay the VAT to HMRC.
-
Customer to pay VAT to HMRC.
-
UK customer to pay VAT to HMRC.
-
Note: To apply the same rules to credit notes, you must specifically select the reverse charge VAT rate on the sales return line.
For more information, see Domestic reverse charge VAT rates for preventing carousel fraud in the UK.
Construction Industry Scheme (CIS) reverse charge
Sage 200 Standard does not support the Construction Industry Scheme (CIS).
You do not need to set the options for Print the following text on invoices when CIS reverse charge is applied and Print the following text on credit notes when CIS reverse charge is applied.
Intrastat
These settings are used by the Sales Orders module only, and are not used by Invoicing.
Open: Settings > Invoicing and Sales Orders > Invoice and Order Settings | Intrastat
If your company buys or sells goods in the EU, then you may need to report on this if the total value of this trade is more that the an amount specified by HMRC (Northern Ireland), or the Revenue Commissioners (Ireland). This is called an Intrastat Declaration.
-
If you're required to complete an Intrastat declaration, select Generate Intrastat entries for sales orders/returns.
Invoices created through the Invoicing module are not included on Intrastat returns.
You must provide additional delivery terms on your Intrastat declaration if you exceed the delivery terms threshold.
If you exceed (or think you will) the delivery threshold set by HMRC or the Revenue Commissioners, choose the terms of delivery for your Intrastat Declaration. The Terms of delivery must be included once you exceed the limit.
- Select Include Terms of Delivery on Intrastat Entry. This adds delivery codes to your Intrastat Declaration.
-
Choose the Terms of Delivery code to use by default. You can change this on individual order lines when you maintain Intrastat entries.
Code Description EXW Ex works FCA Free carrier FAS Free alongside ship FOB Free on board CFR Cost & freight (C&F) CIF Cost, insurance and freight CPT Carriage paid to CIP Carriage and insurance paid to DAF Delivered at frontier DES Delivery ex-ship DEQ Delivered ex-quay DDU Delivered, duty unpaid DDP Delivered, duty paid DAP Delivered at place DAT Delivered at terminal XXX Other terms not listed
See the HMRC website for more information about terms of delivery.
The Nature of Transaction Code (NOTC) indicates the type of transaction which is being declared on the Intrastat. This code identifies the transaction type on the declaration, e.g. sales, acquisitions, goods sent for processing or repair, or free of charge goods.
Select a Default nature of transaction code (NOTC) from the list. This is the default setting, but you can change this on individual order lines by using Intrastat Entry Maintenance.
-
For HMRC, the codes available are: 10, 16, 17, 18, 20, 30, 40, 50, 60, 70, 80, 90.
You can find details of these codes from HMRC, see HMRC: Notice 60: Intrastat general guide (opens in a new tab).
-
For the Irish Revenue, the codes available are: 1, 2, 3, 4, 5, 6, 7, 8, 9, 11, 12, 21, 22, 23, 31, 32, 33, 34, 41, 42, 51, 52, 60, 71, 72, 80, 91, 99.
You can find details of these codes from the Irish Revenue, see Irish Revenue: VIES and INTRASTAT Trader's Manual (PDF).
These options will only be displayed if the company's Country code is set to IE - Ireland in your Company Details.
-
Default mode of transport code (MOT).
The codes are required for an Irish declaration and include: 1 (Sea), 2 (Rail), 3 (Road), 4 (Air), 5 (Post), 7 (Fixed Transport Installation), 8 (Inland Waterway) and 9 (Own Propulsion).
-
Include statistical value on Intrastat entry.
Select this if you want to include the statistical value on the Intrastat. This is the value of the goods, adjusted to include any landed costs.
By default, the statistical value automatically calculated will be identical to the goods value. If you are reporting statistical value, you may use the Intrastat Entry Maintenance option to correct the value if required.
Useful Info
About entering payments with invoices and orders
If you want to be able add payments at the same time as entering an order or invoice, you'll need to make sure you've set up Sage 200 correctly.
You might want to do this if your customers pay at the time of ordering or if you take deposits.
Before you can enter a payment you will also need to set up Payment Methods. These describe the type of payment (cash, debit card, credit card, etc.), and the bank account the payment is to be paid into. You can set these up at any time once you have finished the Configuration Assistant. Use the Settings > Sales Orders > Payment Methods screen.
About invoicing payments with orders immediately
These settings are used by the Sales Orders module only, and are not used by Invoicing.
The option here sets Invoice with payment immediately to be selected by default when an order is entered. You can change it on individual orders, if required.
HMRC rules state that VAT should be recorded on the VAT Return at the time of invoicing or on receipt of the payment, whichever is the first. When a payment is taken at the time of ordering, you need to decide whether the payment should be invoiced at the same time. This is because the payment must have a tax point date in the same period as the money was actually received.
Note: This only applies to sales orders. If you're using Invoicing then you would generally expect to post the invoice within a few days of raising it.
You don't need to select this if you're going to raise an invoice for the order more or less straight away, as the payment and the invoice will have a tax point date in the same period.
The value of the payment is recorded with the order, but payment is not posted to the VAT Return. The order is processed in the usual way; the goods are despatched, the invoice is printed, and then posted. When the order is posted, the payment is posted at the same time. This updates the customer's account, adds the VAT to the VAT Return and allocates the payment to the invoice. This also sets the tax point date for to be the same as the invoice date.
As the payment is linked to this order, you can't create an invoice from the order for less than the value of the payment. If the payment is just a deposit then this is fine, as the total goods value will more than the payment amount. If you receive full payment for the order, then you'll have to despatch all the goods before you can raise an invoice.
Select this when you need to include the payment amount on the VAT Return before despatching the goods. This allows you to despatch the goods and invoice the customer in the usual way whilst also including the VAT on the VAT Return. You can also partially despatch and partially invoice the order.
This process creates a special VAT invoice and a separate goods invoice for your customer.
-
Enter the order, enter the payment, select Invoice Payment immediately and Save.
A VAT invoice is created and printed. This shows the total goods and VAT values but indicates that it's for VAT purposes only.
-
Post the VAT invoice. This creates the tax point date.
- The payment is posted to the customers account.
- The payment value is shown as Declared on the order.
-
The VAT invoice is posted to the customer's account, the VAT Return and to the Prepayment nominal account, as follows:
Nominal Account Debit Credit Prepayments Net VAT VAT Debtors Control Gross - The invoice is allocated to the payment.
- Despatch the goods as usual.
-
Print an invoice for the goods as usual and send this to the customer.
This shows the goods less the value of the payment. If the order was paid in full, the invoice value will be zero.
This has a new invoice number, so you'll always have an additional VAT invoice associated with this order.
-
Post the goods invoice.
-
The customers account is updated.
-
The net value is reversed out of the Prepayments account and posted to the correct sales account.
Nominal Account Debit Credit Prepayments Net invoice value Sales account Net invoice value
-
What if there are still goods outstanding?
If the payment was a deposit, then the VAT invoice will only be for the amount of the deposit. Any remaining goods will be included on the goods invoice and will be outstanding on the customer's account, ready for you to allocate the remaining payment when you receive it.
About Opayo and card processing
Opayo (formerly Sage Pay) is an online card service provider similar to PayPal. Opayo integrates seamlessly with Sage 200 making it easier for your customers to pay you and easier for you to process those payments.
Once you've subscribed and integrated Opayo with Sage 200, you can:
- Take card payments from your customers and input them directly into Sage 200. This is useful when a customer pays you over the phone.
- Add Pay Now buttons to invoices, statements and debtor letters, so your customers can pay you immediately. Your customer just clicks the button and enters their card details.
- Import payments made using the Pay Now option, directly into Sage 200.
See Take card payments using Opayo (formerly Sage Pay).
Sage is providing this article for organisations to use for general guidance. Sage works hard to ensure the information is correct at the time of publication and strives to keep all supplied information up-to-date and accurate, but makes no representations or warranties of any kind—express or implied—about the ongoing accuracy, reliability, suitability, or completeness of the information provided.
The information contained within this article is not intended to be a substitute for professional advice. Sage assumes no responsibility for any action taken on the basis of the article. Any reliance you place on the information contained within the article is at your own risk. In using the article, you agree that Sage is not liable for any loss or damage whatsoever, including without limitation, any direct, indirect, consequential or incidental loss or damage, arising out of, or in connection with, the use of this information.
Invoice and order user permissions
Tracking and shipping information for a despatch
Reference
For more information about EU zero rated sales, see HMRC (gov.uk) (opens in a new tab).
For more information about the Intrastat and delivery terms threshold and the nature of transaction codes, see UKTradeInfo (uktradeinfo.com) (opens in a new tab).