How to
Set report criteria
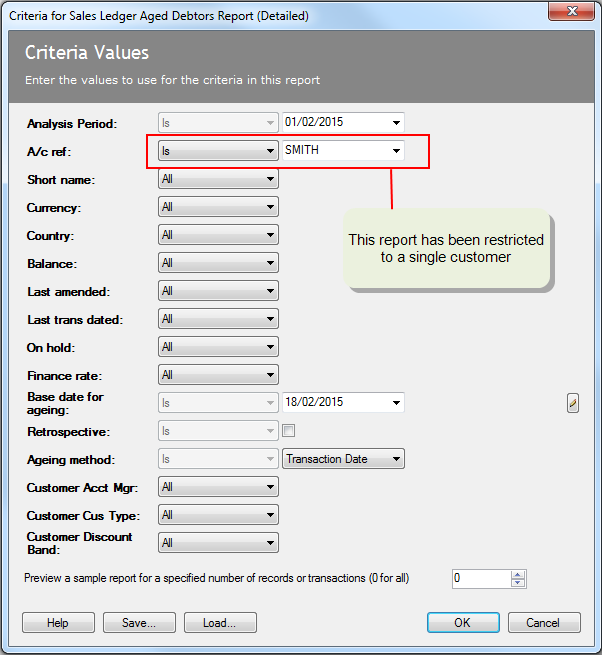
On many reports you can control the range of records that will be included in the report using the fields on the report criteria. This displays when you select a report.
The criteria varies between reports but you will find the following criteria are available on most reports:
- All: Includes all records without restriction.
- From: Includes records with this value and greater. For example, you could report on customers with a minimum balance.
- Between: Includes everything between two set values inclusively. For example, you could report on a range of accounts.
- To: Includes records up to, and including, the value. For example, you may want to report on customer with a specific maximum credit limit.
- Is: (equals) Includes records with this value. For example, entering 12345 will select the account 12345.
Save a set of report criteria for future use
-
Click on the relevant report in the menu.
The report criteria window is displayed.
- Set the criteria you want to regularly use.
-
Click Save...
The Saved Criteria window is displayed.
-
Give your criteria record a name and click OK.
The Saved Criteria window closes and your report criteria is saved for later use.
Run a report from a saved set of report criteria
-
Click on the relevant report in the menu.
The report criteria window is displayed.
-
Click Load....
The Saved Criteria window is displayed.
-
Select the criteria you want to use and click OK.
The Saved Criteria window closes and the criteria defined in the selected record is displayed on the report criteria window.
- Click OK to run the report.
Print, preview or spool reports
When you generate a standard report, it will either be printed, previewed or sent to the spooler queue. This is controlled by your default output mode, which sets how all reports, letters and other documents are output. The output modes are:
-
Printer: All reports are sent directly to a printer.
Note: You can also print to a printer after previewing on-screen, or sending the report to the spooler.
-
Preview: All reports are displayed in preview mode first. This shows the report as it will be printed. You can amend the format of the report and then send them to the printer.
-
Spooler: All reports are sent to the spooler queue, which saves the reports so you can print them at another time.
To control how reports and documents are output:
Open: ![]() Tools > Choose Output Mode.
Tools > Choose Output Mode.
- Select the output mode to be used for reports and other documents generated by the system.
About reports
Standard reports have been provided for every area of Sage 200. You can access them from the Reports section of the relevant section of the menu, from the relevant desktop list or workspace and from the Self Service web app.
Although the layout and information in these reports is fixed when you run them you can use report criteria to control which records are selected and displayed on each report. You can also save any criteria you regularly use to ensure your reports are generated using the same information.
About customising reports
If you want to make your own changes to any of the reports in Sage 200, such as add your company logo, add text, data fields or email settings, you can do this using Report Designer. See Customise reports.