Find this screen
Open: Settings > Organisational and Financial > Custom Report Manager
Watch a video
Using Custom Report Manager and saving a standard document (video)
How to
Download a report
We have provided a number of reports in addition to the default reports installed with Sage 200. If you would like to use any of these reports, you must first download the report file to your PC, and then upload the report to Sage 200.
Save the report that you want to use:
-
Click to the link below to download the report file.
If clicking the link doesn't work, right-click the link and select Save link as.
Note: For more information about the content of each report, see Additional reports you can install.
-
Save the .report file to your PC.
If your browser asks you want to do with the file, choose to Save the file (rather than open it).
Upload the report to Sage 200
If you have downloaded a report, or have been provided with a report file, you must upload the report to use it with Sage 200.
Use the Custom Report Manager to upload the report file to the reports folder in Sage 200.
Open: Settings > Organisational and Financial > Custom Report Manager.
-
Click Upload.
-
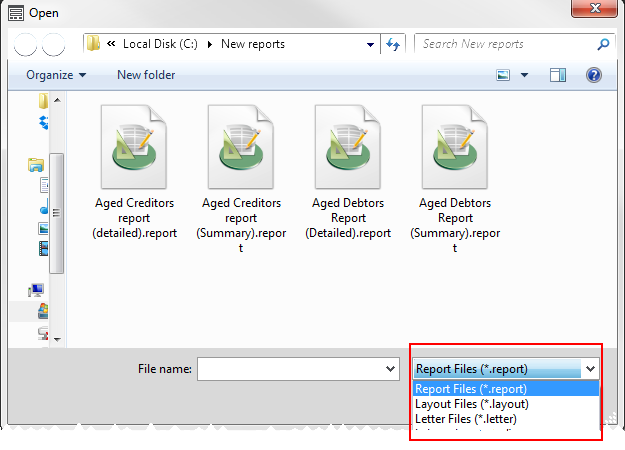
Browse to where the report or layout is saved.
Tip:If you're uploading a layout, letter or label, remember to change the file type.
-
Click Open.
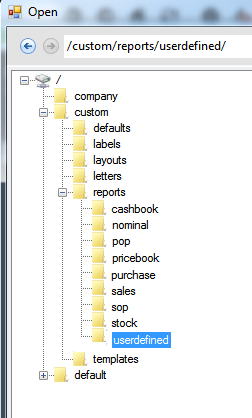
The report or layout is uploaded to the following location in Report Designer: Custom > Reports > UserDefined.
To run the report from Sage 200, you'll need to add it to the menu.
Add a report to the menu
Before you can run the report from Sage 200, you need to add it to the menu and then decide which users can access the report.
You can only add reports that you have uploaded, or custom reports that you have created in Report Designer and saved to the UserDefined folder.

Note: Before you can add a report, you must first upload a report, or save a custom report in Report Designer to the UserDefined folder.
- Click Add to add a new line.
-
In the Report column, select your report from the list. For example, top customer list - ytd.report.
You will only see reports that you have uploaded, or reports that you have customised in Report Designer and have saved to the UserDefined folder.
- Enter the Name to use for the report in the Sage 200 menu. For example, Top Customers.
- In the Module column, select where the report will be located in the Sage 200 menu. For example, if you select Sales Ledger the report will be included in the Customers menu, in Customers > Custom Reports.
- Click OK.
-
Close and open Sage 200 to see the report on the menu.
The selected report is added to the menu in a folder called Custom Reports, for example Customers > Custom Reports.
Note: Only selected users can see and run the report.
Choose who can run the report
- Select the report from the list.
- Choose which users can access the report from the Users for list.
- Click OK.
Note: Administrators have access to all reports by default.
Useful info
Additional reports you can install
We have provided a number of reports in addition to the default reports installed with Sage 200. If you would like to use any of these reports, you must first download the report file to your PC, and then upload the report to Sage 200. If you've migrated from Sage 50 Accounts, some of these reports will be more familiar.
Customers
| Report | Description |
|---|---|
| Top Customer List - YTD | Shows the turnover for the year to date for each customer. Use this to find who your top performing customers are. |
| Customer Sales by Product Group (Summary) | Shows the information about sales made to each customer by product group. The invoices, credit notes, quantity and net value are totalled for all items per product group. |
| Customer Credit Limit and Balance | The credit limit and balance to date for each customer. |
| Customers On Hold | Shows the customers whose accounts are hold. |
| Customer Receipts Day Book | Lists customer receipts by bank account. |
| Customer Day Book | Lists invoices and credit notes by customer |
Suppliers
| Report | Description |
|---|---|
| Top Supplier List -YTD | Shows the turnover for the year to date for each supplier. Use this to find who your top performing suppliers are. |
| Supplier Payment Day Book | Lists all invoices and credit notes by supplier. |
Nominal
| Report | Description |
|---|---|
| Nominal Balances (Monthly Breakdown) |
Shows the balance (debit (+) or credit (-) ) of each nominal account as a total and per period for the current financial year. Accounts without balances are not included. |
| Profit and Loss (MTD-YTD) portrait | Shows your profit and loss for the current period and year to date in a portrait view. |
| Balance Sheet (MTD-YTD) portrait | Shows your balance sheet for the current period and year to date in a portrait view. |
| Nominal Ledger Trial Balance (detailed) portrait | Shows the debit and credit balance for all nominal accounts in a portrait view. |
| Trial Balance (consolidated) landscape and portrait versions | Shows the debit and credit balance for all nominal accounts by account number only. |
Fix it
You have to choose a user for each report before you can save your changes. This is because at least one user must have access to the new report.
To do this:
- Select a line and then select the user(s) from the Usersfor column. All users in this role(s) will be able to run the report.
- Repeat for each report you've added.
- Click OK.
You may see this error if you've added extra lines but haven't added a report to those lines. To save your changes, delete the blank lines.
This could be because:
-
Sage 200 hasn't been restarted.
You need to restart Sage 200, before you can see the new report on the menu. If the report isn't there try closing and then opening Sage 200.
-
You don't have access to the report.
You'll only be able to access the new report if it's been linked for you.
-
The report has been added to wrong section of the menu.
The report will appear the Custom Reports folder for the section of the menu selected on the Custom Report Manager screen.
-
The report hasn't been given a name.
The report appears in the menu with the text entered in the Name column. If this is left blank the report can't be shown on the menu.
What happens when
I upload a new report?
- The report is added to the Reports folder in Microsoft Azure. You can customise the report from here using Report Designer.
- The report is added to the menu for the module you selected. You can find it in the Custom Reports section.
- Any users in the roles you selected can run the report.
Other useful information
Using Custom Report Manager and saving a standard document (video)