Watch a video
How to
Display a list
Lists can be displayed in the work area or in their own window.
-
To display a list in the work area, select the
 List item from the menu.
You can have up to six lists open at once. The open lists are displayed in the Activity bar at the bottom of the screen. Just click the links to change the list displayed.

-
To open lists in their own window, right-click on the list in the menu and select Open in New Window. This is useful if you want to look at multiple lists at the same time or view a list full-screen.
Note: By default, each list displays 360 records per page. You can change this by selecting Scrollable View at the top of the list, but note that this only shows the first 1000 records. However, rather than scrolling to find records, we recommend that you use Search list to find the record you want.
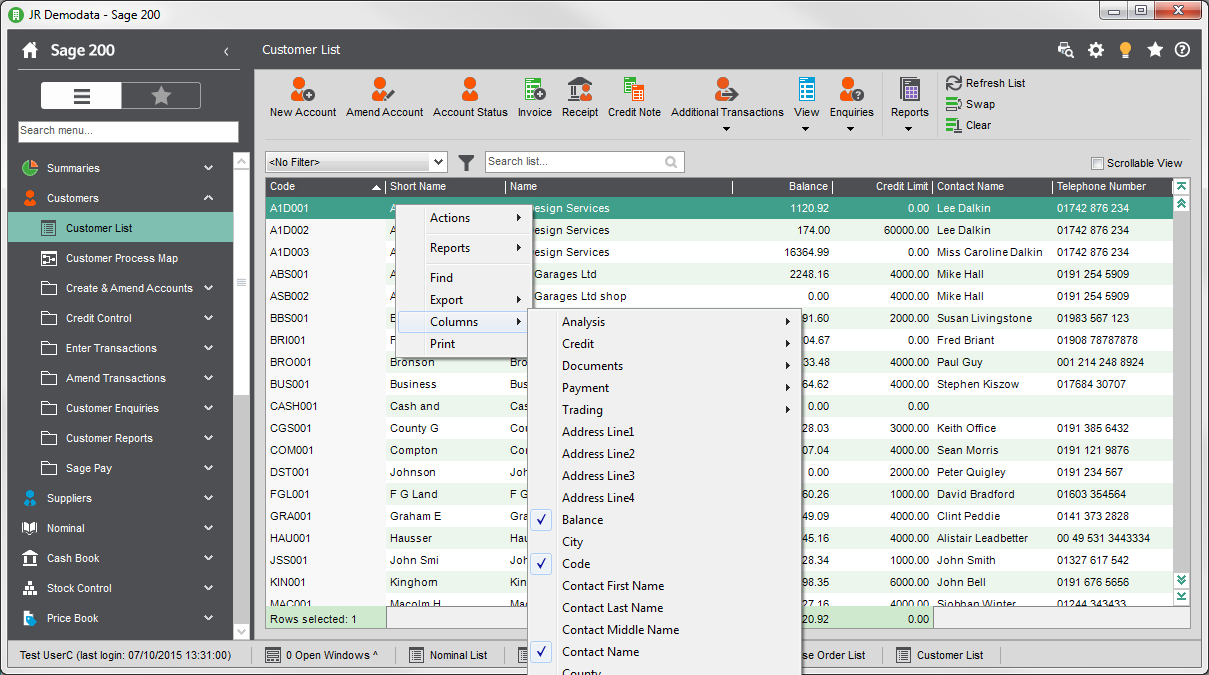
Hide or display columns
-
Right-click on an item in a list.
-
Select Columns from the menu. A list of column headings is displayed.
-
Select the columns that you want to add or remove from the list.
Select items
-
Select multiple items by holding Ctrl or Shift when you click.
-
Use Swap
 to swap any selected items with those that have not been selected.
 -
Use Clear
 to deselect the highlighted items.
 -
Use Refresh List
 to refresh the list.
 -
Double-click on an item to perform the default action.
Tip: The number of selected items and their totals are displayed at the bottom of the list.
Hide or display icons
-
Right-click anywhere in the toolbar area of the list.
-
From the menu, select the feature that you want to hide or display.
Perform tasks and open windows
Each list has common tasks associated with it, such as Amend Account from the Customers list or New Order from the Sales Order list You can open the windows for these tasks in two ways.
-
Select the appropriate icon from the top of the list
-
Right-click anywhere in the list and select the Actions from the menu.
If you select an item in the list, the window will open with that record already selected. For example, select a customer account and click Amend Account.
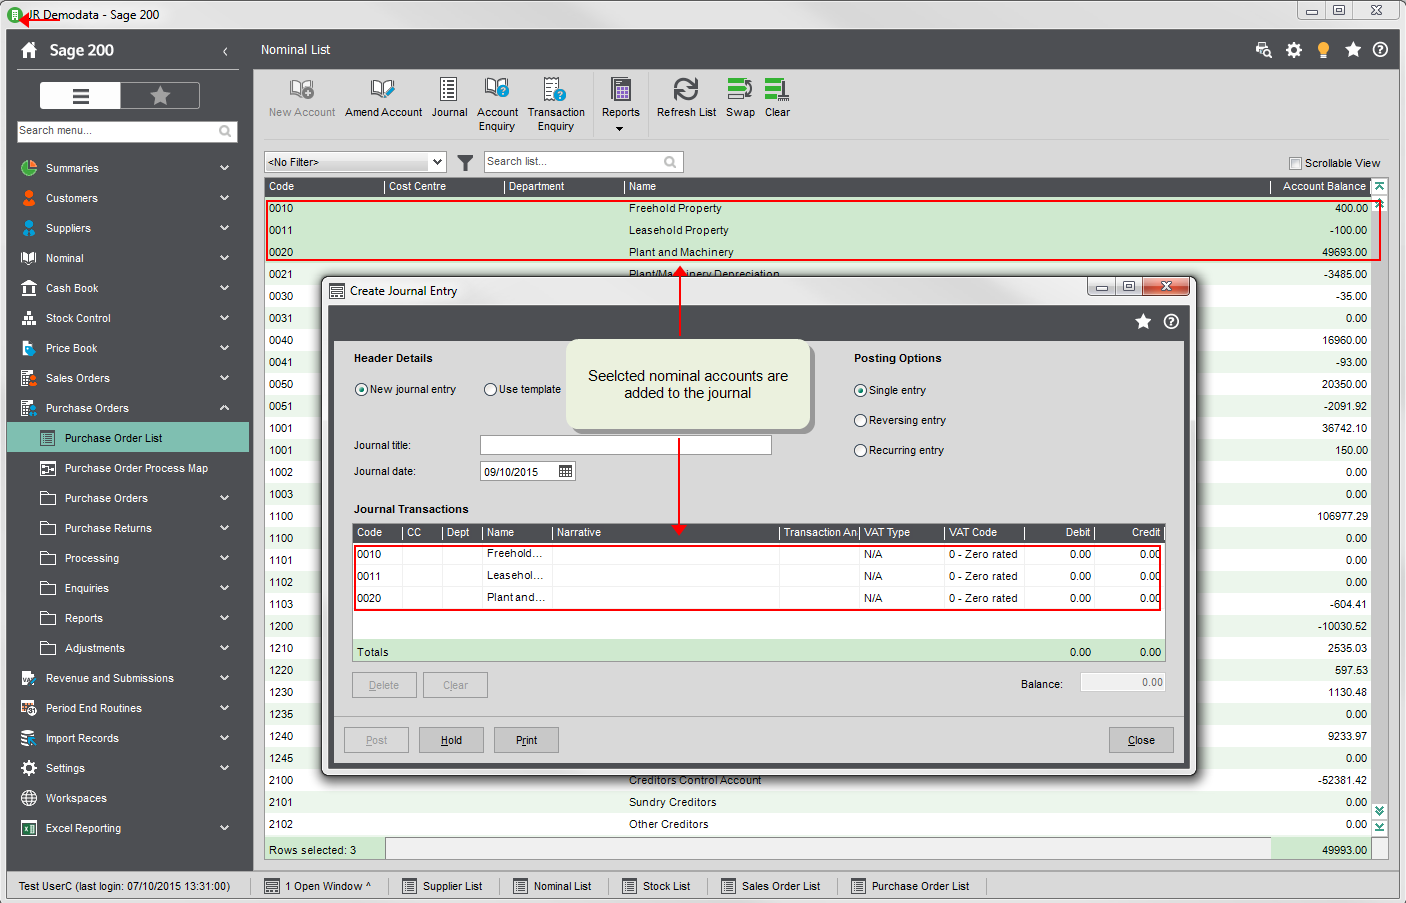
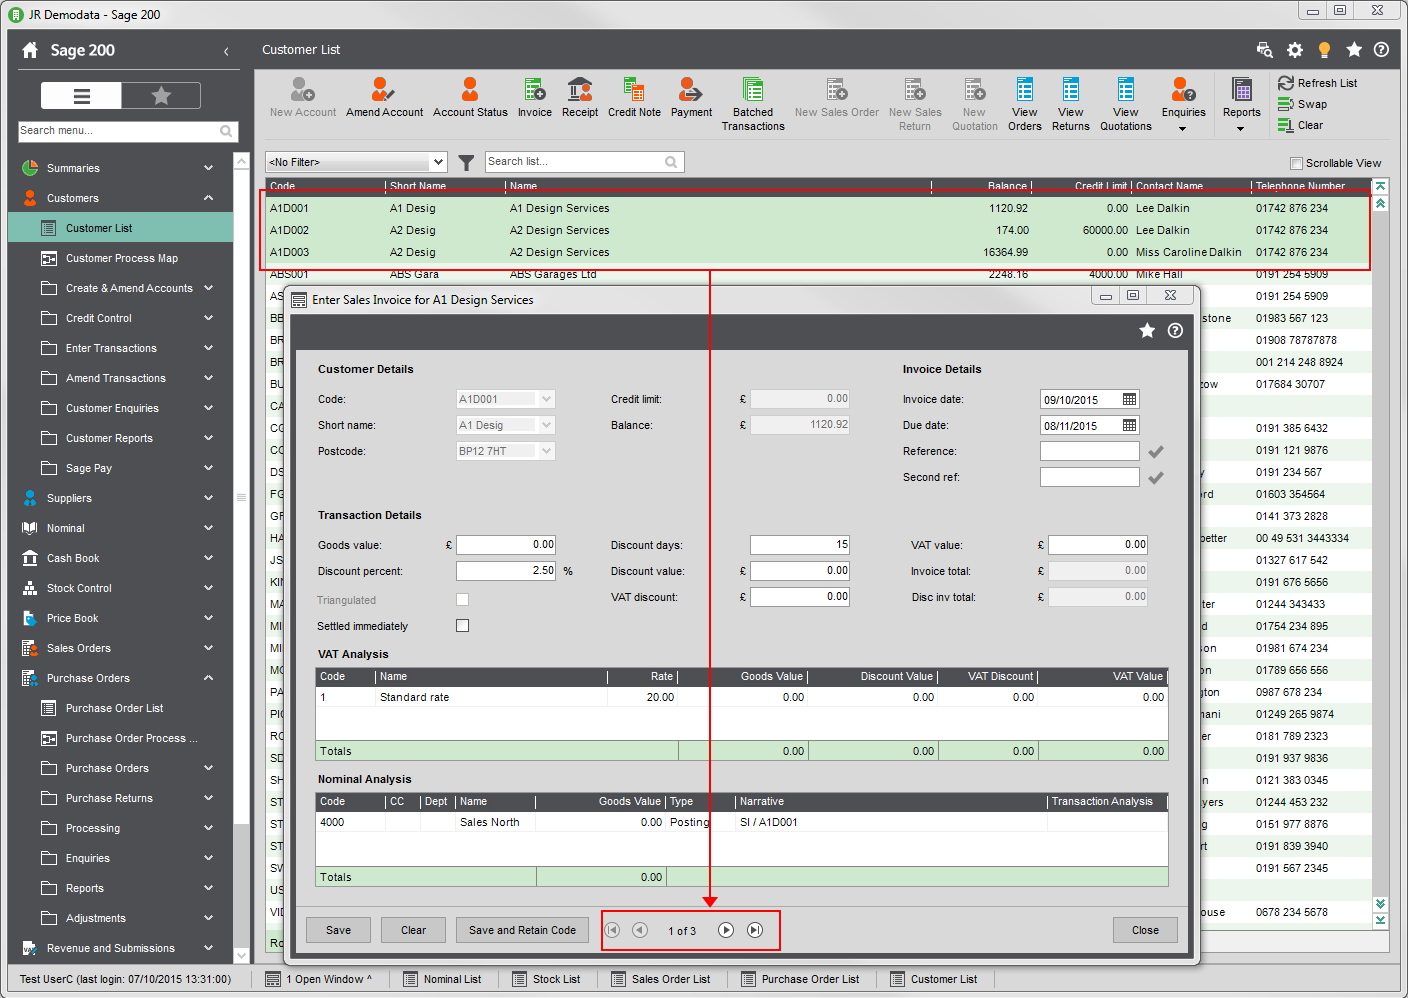
How to process several records at once
For some windows you can select multiple items. For example, select several edit details for a number of selected accounts. For example:
-
From the Customers list, select a several customers and click Amend Account. The Account Details for the first customer in the list appears. You can scroll through the remainder of the accounts, using the scroll buttons at the foot of the window.

-
Select several nominal accounts from the Nominal list and click Journal. This generates a journal entry containing the selected nominal accounts.
-
Select several customer records from the Customers list and click Invoice. This generates a batch of invoices for the selected customers.
Find items in a desktop list
Search for a items anywhere in a list
To search for items anywhere in the desktop list, use the Search list box at the top of the list.

Find items in particular list columns
Use Find to search for items in particular list columns.
-
Right-click inside a column in the list and select Find.
-
Enter the text to look for in the Find box.
-
Select the column to search from in the In column list.
By default, In column is set to the column that you right-clicked inside.
-
Choose how to search for the text in Match.
-
Select Any to find the text anywhere in the item. For example, if you search for cost you will find Cost of sales - Default and Vehicle cost.
-
Select Start to search for the text if it appears at the start of the item. For example, if you search for cost you will find Cost of sales - Default but not Vehicle cost.
-
Select Whole to search for the full text of the item. For example, you will need to enter Cost of sales - Default to find Cost of sales - Default.
-
-
Select Apply Filter to find the text.
Note: The filter is applied to the current view of the items you can see in the list. If you apply another filter to the list, you may see fewer items then you expect, because the filter is applied in addition to the previous filter. To reset the list so that Find searches all items again, select Clear Filters in the Find window, or select Refresh List in the desktop toolbar.
Sort lists
Select a column heading to sort the list by that column, and select it again to reverse the sort order.
Create a search filter
You can set up a search filter to limit the information that is displayed, for example search for suppliers on hold or order values over 1000.
-
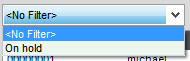
Select the filter from the drop-down Filter list.
You can create a set of filters that you use regularly, and make these available to any user in the same company by making the filter Public. If you make a filter public it can be seen by everyone, but also changed or deleted by anyone.
-
Click the Filter
 icon to display the Maintain Filters window.
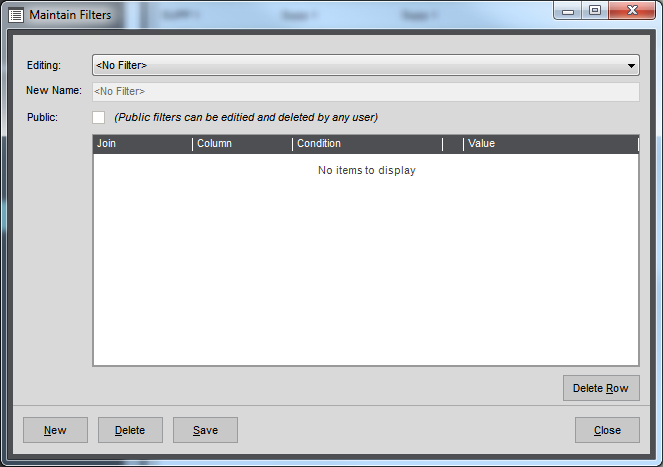
-
Click New.
-
Enter a unique Name for the search filter. This is a unique name for the company and list combination. You will not be able to use a search filter Name that another person has used already for the same company and list.
-
Select Public if you want any user of Sage 200 who has access to the same company and same desktop list, to be able to edit or delete the filter.
-
Specify the search criteria. See the examples below for ideas.
-
If you add more than one line, specify how to handle the conditions from Join drop-down list:
-
Select And for both conditions to be met.
-
Select Or where either of the conditions is met.
-
-
To delete a line, click Delete Row.
-
-
Click Save.
You can now apply the filter from the Filter list.
Note: To remove a filter, select the filter and click Delete and confirm that you want to delete the filter at the prompt.
Open: Suppliers > Supplier List.
To set up a filter to display supplier accounts that are on hold, we want to show accounts where On Hold is set to Yes (True).
| Join | Column | Condition | Value |
|---|---|---|---|
| Where | On Hold | Is Equal To | True |
Print the list
-
Right-click the list and select Print.
-
Choose what to print from he list:
-
Select Print all to print all the items in the list. If you have selected a search filter, this only includes the records matching that criteria.
-
Select Print visible to print only the items in the list that are displayed.
-
Select Selected items only to print only the items you have highlighted.
-
-
Set the page layout as either Portrait or Landscape.
-
To change your printer settings (such as selecting the printer), select Print Settings.
-
To print the items:
-
Click Print to print the items.
-
Click Print Preview to display the report in a preview window, before you print.
-
Export to Excel
You can export selected items or all items in a list to an Excel spreadsheet.
-
Right-click in the list, and select Export.
-
To export the highlighted items in the list, select Selected to Excel.
-
To export all items in the list, select All to Excel.
If you have selected a search filter, this will only include the records that have been filtered.
-
-
The items are exported to an Excel spreadsheet.
You can view the spreadsheet in any application that supports the Excel format.
Useful Info
About lists
Use lists to view and work with company information, such as customer and supplier records. There is a list for each of the following: customers, suppliers, nominal accounts, bank accounts, stock items, sales orders, and purchase orders.
The lists can be opening from the relevant section of the menu.
Automatic refresh
The following lists will refresh automatically when you add or edit an item in the list:
-
Sales Order List.
-
Invoicing List.
-
Purchase Order List.
-
Stock List.
-
Price Book List.