Try and buy Sage 200 Standard
This topic is not applicable to Sage 200 Standard for Education.
You can sign up for a free 30 day trial of Sage 200. This lets you use the software with a supplied demonstration data company.
You cannot use it to enter your real accounting data. If you want to do that, you must buy the software.
If you decide that you want to buy Sage 200, call Sage on 0800 694 0563 to speak to one of our advisers.
Start your free trial
To start your 30 day free trial of Sage 200:
-
Visit the Sage website.
- In the UK, go to: Free trial of Sage 200 Standard (UK) (opens in a new tab)
- In Ireland, go to: Free trial of Sage 200 Standard (Ireland) (opens in a new tab)
- Follow the instructions to start your free trial.
-
If you don't have a Sage customer account with a Sage account, you will need to create an account.
It's quick and simple, and will only take two minutes of your time.
-
When you start your trial, Sage will send you an email with a link to access the trial version of Sage 200.
- When you have downloaded and installed the software, log in using your Sage account credentials.
- The trial software includes a company with demonstration data. You cannot change company or set up a new company using the trial version.
Buying Sage 200 Standard
When you have decided you want to buy the software, you need to call Sage on 0800 932 0348 and speak with one of our advisers who will assist you with your purchase.
Note: If you have tried the software first, your trial demonstration site will no longer be available to you and instead you will have a new live site of your own to set up and to enter your real company data into.
Sage records your site details and requirements, using Sage Provisioning Portal, our ordering management system for online products and services. Your new site will be set up for you on this system and you will have administrative access, so that you can log on and manage your company and user data from the site.
There are two levels of Sage Provisioning Portal user for Sage 200.
-
Administrative users that have a role of Customer Administrator (Administrator) or Customer Operations Agent (Operator).
-
Basic users that have a role of Customer User (User).
Here's a summary of what each level of user can do within Sage Provisioning Portal. It is up to you how to organise your users and what level of access to give to each user.
| Access Level | Sage Provisioning Portal Role | Description of the user and an explanation of what the user can do in Sage Provisioning Portal | |
|---|---|---|---|
|
Administrative |
Customer Administrator (Administrator) |
Can act as the contact between your organisation and Sage. |
|
| Customer Operations Agent (Operator) |
Can perform operational activities such as back up. |
|
|
|
Basic |
Customer User (User) |
Can download and install Sage 200 Standard software. |
|
What information do you need to provide?
Sage will take you through the details required and will set up your site with a default administrative user, but you should have the following details to hand:
- The number of users who need to use Sage 200 at the same time.
- The number of web users required (web users can log on and access the Sage 200 workspaces in a browser).
- The number of companies you require.
- Whether you require Sage 200 Excel Reporting.
Accept the terms and conditions for your live site
Before you can use the site, you must accept the terms and conditions for using the site.
-
Sage will send an email with a link to the terms and conditions page, which you will need to accept to continue.
You can also access terms and conditions by logging onto Sage Provisioning Portal at www.sageerponlineservices.com (opens in a new tab). You will be presented with the Site Dashboard, listing your site and you will see a red triangle
 at the right-hand side which you can click on to go to the terms and conditions page.
 -
Check the terms and conditions. Your requirements for users and reporting are listed at the top. You will also see details of the next three direct debits for your subscription.
If everything is as you expect, select the check box, I accept the terms and conditions, and click Confirm.
Download your software
Once you have accepted terms and conditions, you can find links to download Sage 200, and also the URL for the web client (Self Service web app).
- Open Sage Provisioning Portal (opens in a new tab) and log in.
- Select Dashboards > Site Dashboard.
- Select the site Name to display the site details.
-
In the site Clients details, select the Sage 200 App link to download Sage 200.
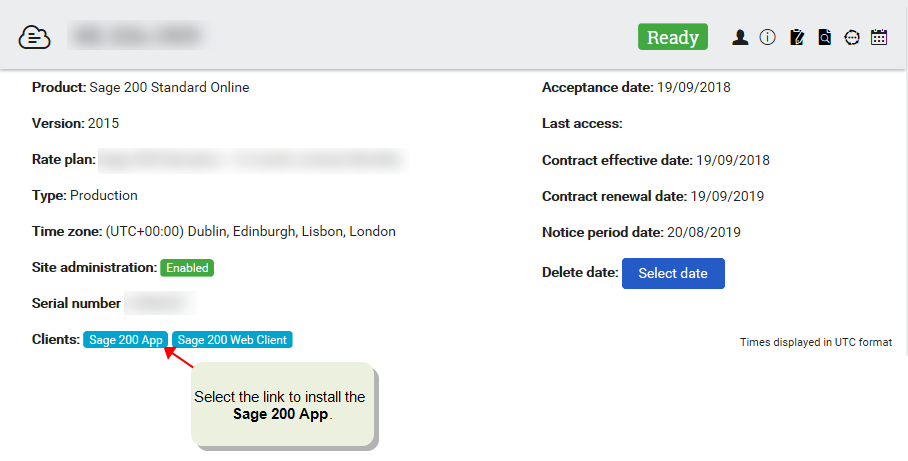
- You can only download software from the link provided when the site Status is Ready.
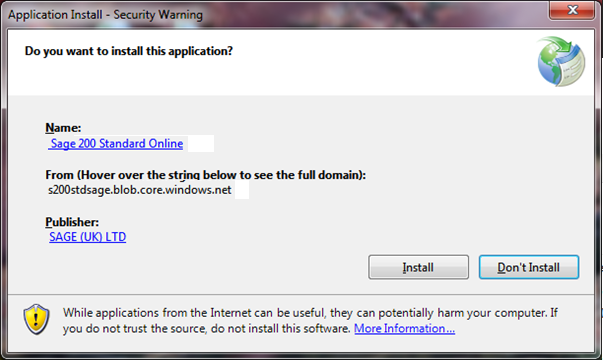
- Depending on the browser you are using, you can either run the installer straight away, or save it and open it from your downloads folder.
-
When you run the installer, click Install.
Note: The Sage 200 application is installed using ClickOnce, and installed to your AppData\Local\Apps folder. To find the installation folder, choose ![]() Tools > About Sage 200, click System Information, then check the Client Program Directory on the General tab.
Tools > About Sage 200, click System Information, then check the Client Program Directory on the General tab.
Creating company databases
Once you have installed your software, you will be able to open Sage 200. Before you can use it for the first time, you need to create the new company databases. This is done the very first time you log on to Sage 200.
Note: The number of company databases that you can create is determined by your subscription, set up in Sage Provisioning Portal. In the example for CustomerA, only one company (the default) has been purchased. Before you can assign any users to a company, you must create the company database for the company.
-
Open Sage 200 Standard.
-
Enter your Sage account credentials to log in.
-
When you start Sage 200, you can create a new company.
-
If this is your first company, the company name will be already be filled in for you and you can only click OK to continue.

-
If you have more than one company assigned to your site, you'll be prompted to create additional companies when you start Sage 200.
You can create a new company, restore a company backup from a bacpac, or create a company with demonstration data. If you don't want to do this now, just click Cancel.
For more information on creating companies, see Companies.

-
-
To create the company database, click OK.
It might take a short while for your company database to be created.

Tip: While you are waiting for the company database to be created, you can log into Sage Provisioning Portal, add your users and assign them to the company. For more information, see Adding users in Sage Provisioning Portal and assign them to a company.
-
If you have created a new company, the Configuration Assistant will open to help you set it up.

Add users in Sage Provisioning Portal and assign them to a company
While you are waiting for the company database to be created, you can log into Sage Provisioning Portal, add your users and assign them to a company. If your subscription only allows one company, you will only be able to assign users to that company but if your subscription allows more than one company, you can assign users to the relevant companies within Sage Provisioning Portal.
Note: You will not be able to assign users to companies until the company databases for each company have been created. However, you will be able to add the users in preparation for assigning them.
Add users
- Within Sage Provisioning Portal, select Organisations > Users.
-
Click Add User.

- Enter the user first Name, LastName and Email address. The Organization is entered automatically for you and you can't change it.
-
Select the level of user.
-
Administrative users should be a Customer Administrator (Administrator) or Customer Operations Agent (Operator).
-
Basic users should be a Customer User (User).
Note: If you are a Customer Administrator (Administrator) only, you won't be able to add a user who is a Customer User (User). If you are a Customer Operations Agent (Operator) only, you won't be able to add a user who is a Customer Administrator (Administrator).
-
- Click Save.