Set up a Sage 200 company for the first time
Before you can use Sage 200, you need to set it up so it meets the needs of your organisation.
The set up process is in three stages:
-
Configuration Assistant.
Everyone needs to complete this first stage.
-
Review and complete setting up Sage 200.
Most people will need to complete some of the tasks in this stage.
-
Create records and enter balances.
Custom and specialist options that will be of interest to fewer people.
Information you need before you start
Before you start, you'll need to gather some information to help you set things up.
The topic below will guide you through what information you need to collect, and what decisions you will need to make.
Don't worry if you do not have all the information to hand right now. You can always change things after closing the Configuration Assistant.
Stage 1 - The Configuration Assistant
The first time you open Sage 200, you will see the Configuration Assistant. Use this to enter basic details about your company, create your nominal account structure and set some default values that support how you operate your business. Once you complete this, you can confidently start using Sage 200.
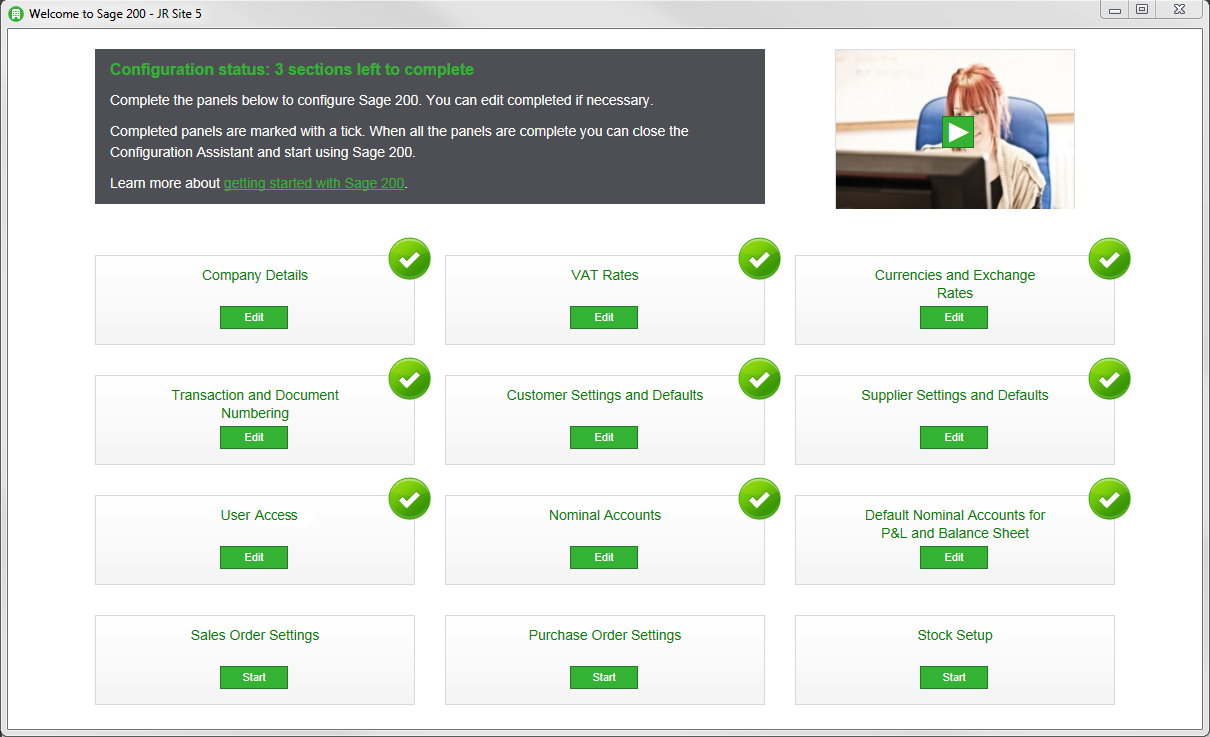
Open each panel in the Configuration Assistant and enter the relevant information and choose how you want to set things up.
The majority of the settings that you enter here can be changed later on after you close the Configuration Assistant - only the financial year cannot be changed.
In the Configuration Assistant you will:
- Set your Financial Year.
- Enter your company information.
- Set your accounting periods.
- Set defaults for your customer and supplier accounts.
- Create your nominal accounts and set up default accounts.
- Enter settings for your sale and purchase orders.
- Create warehouses and product groups for your stock items.
- Choose the screens and features your users can access.
Sage 2 - Review and complete setting up Sage 200
Before you get going with Sage 200, we recommend that you take the time to review your settings and set up any additional features that may want to use.
This sections covers:
- e-Banking.
- Opayo (formerly Sage Pay).
- Intrastat.
- Analysis codes.
- Review and set your accounting periods.
- Sales orders.
- Purchase orders.
When you have completed this set up, we advise that you check the additional configuration and see if it any of it applies to you. If it turns out that you don't need to complete any further configuration, you are ready to begin using Sage 200.
Stage 3 - Create records and enter balances
In this stage you:
- Enter your nominal account opening balances.
- Create your bank accounts and enter their opening balances.
- Create or import customer records and enter their opening balances.
- Create or import supplier records and enter their opening balances.
- Create or import stock items.