Some of the set up required for the credit control features would have been performed during the initial installation and configuration of Sage 200. A check of the settings that affect your credit control activities will ensure they are correct.
You can also make changes to the debtor letter templates we have provided to make them more appropriate, or branded, for your business.
General settings used within credit control
The Ageing periods govern how transactions are reported and when a particular debtor letter is triggered. You specify how many ageing periods you want and then, for both the Debtors periods and Due Date periods, the length of time each period is to cover. Remember:
- Debtors periods:
- Are counted from the day the invoice is raised.
- Are printed on Aged Debt reports and customer statements.
- Due date periods:
- Are counted from the day the invoice becomes due for payment.
- Are printed on the due date report.
- Are linked to debtor letter templates and determine which debtor letter is generated.
Customer settings used within credit control
On individual customer records set the payment terms. These are:
- The number of days allowed for payment after an invoice is raised.
- When the number of days calculation is performed. This can be dates such as:
- From the Document Date.
- From the start of the month in which the invoice is raised.
- From the end of the month in which the invoice is raised.
If you use the same payment terms for all customers you can set default payment terms that will apply to all new customer accounts.
Your debtor letter templates
You need a debtor letter template for each of your due date periods. We have designed four debtor letter templates and linked them to the first four due date periods for you. You can use these immediately. If you want to use your own text, apply branding or company-specific messages to your letters, or have more than four due date periods then you need to use Report Designer to create or make changes to the debtor letter templates.
Before you use the Report Designer, plan the contents of each letter. For example, if you decide to link the production of debtor letters to sanctions, such as reducing the customer's credit limit or putting their account on hold, you can warn of the impending impact to their account in your letters.
Finally, ensure you have copies of any logos or images you want to add to your letter templates.
| Due Date Period | Debtor letter | Severity |
|---|---|---|
|
1 - 1 day after due date |
1 |
Initial reminder |
|
2 - 31 days after due date |
2 |
Demand for payment linked to reduction of their credit limit. |
|
3 - 91 days after due date |
3 |
Final demand with account put on hold. |
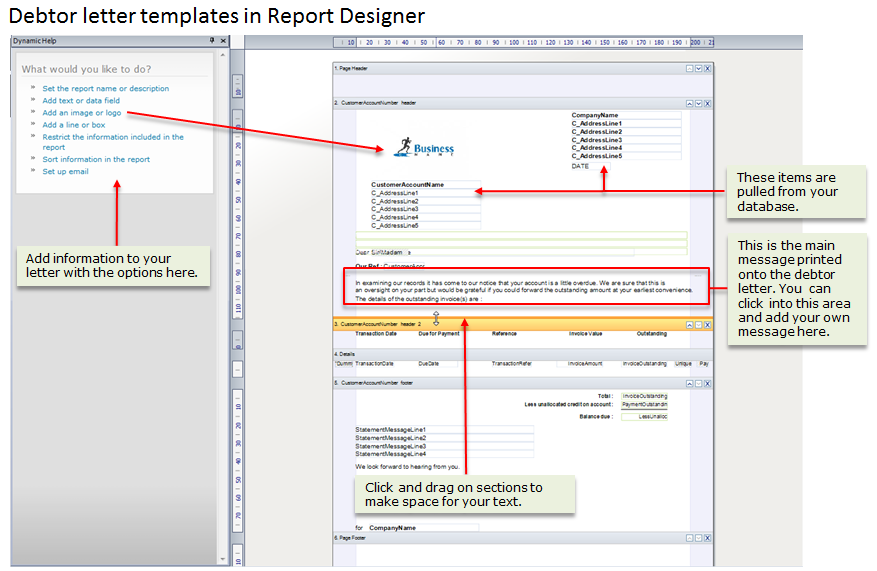
Setting up debtor letter templates in Report Designer
When you look at a debtor letter template in Report Designer you will see a number of codes, take a look at the address codes in the image below for an example. These are called variables and pull information from your database into the letters as they are generated. We advise you do not amend these fields.
What you can do on your debtor letter templates:
- Add you own company logo.
- Amend the existing text or enter your own.
- Resize the text area to fit your text.
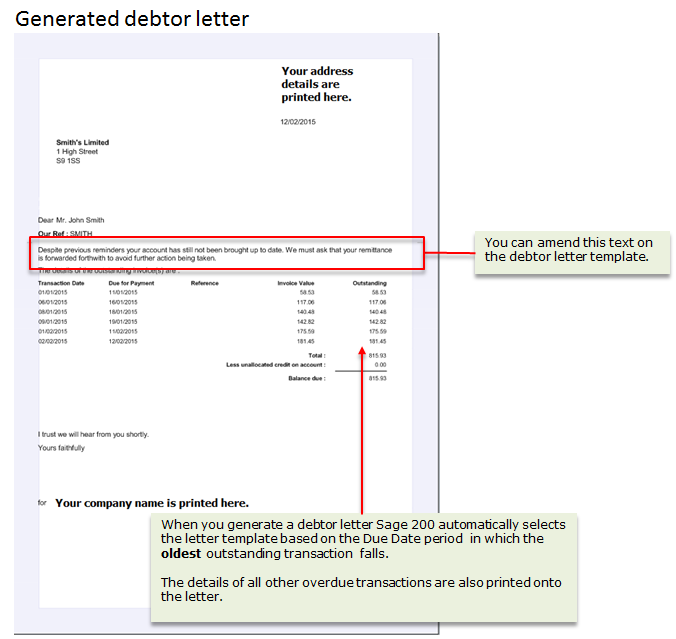
When you have created debtor letter templates you should generate letters from them to ensure they look as you expect.
What do you want to do?
Set or amend the general options used in credit control processing:
- Define your Debtors and Due Date ageing periods
- Enter default payment terms
- Set up debtor letter templates and link them to your Due Date periods
Specify credit control information on individual customer records:
Next steps
After you have set up your debtor letter templates, checked the general options used by the credit control features are correct, and defined payment terms on your customer records you can begin day-to-day credit control monitoring and take appropriate action when issues arise.