Authorise features for roles
You can decide which features of Sage 200 you would like each role A role describes the areas in which users will work normally, e.g. purchase clerk. Roles provide users with access to system features. to be able to use.
Members of a particular role will then be able to use each feature A feature is a name for an action that you can perform in Sage 200; e.g. Enter New Supplier Account, describes the action of adding a supplier account within Sage 200 Purchase Ledger. they are authorised to use. You can authorise features for roles or roles for features.
If you are using Sage 200 Manufacturing, you will see features listed for Bill of Materials and for MFG Bill of Materials. You should ensure that users of Manufacturing modules are members of a role which is only authorised to use MFG Bill of Materials features.
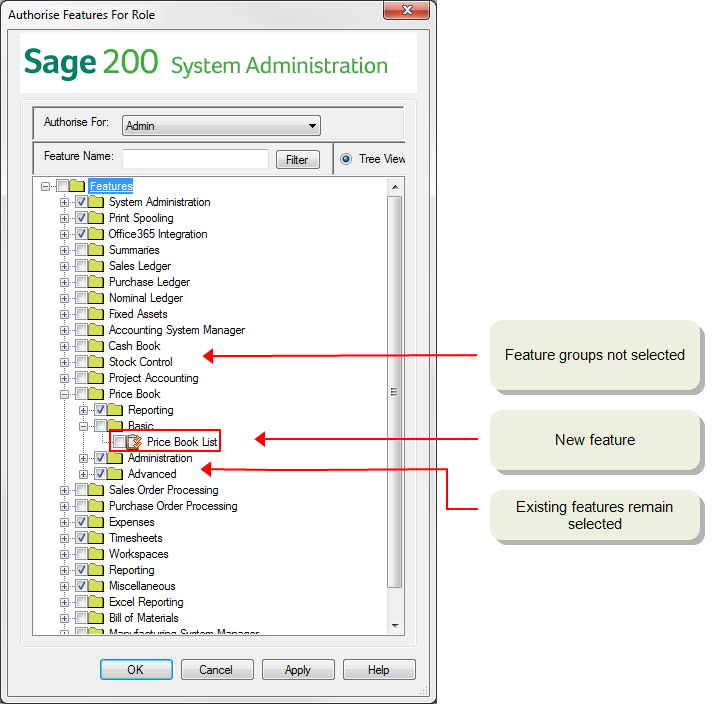
When you upgrade to a new version, any new functionality will have a corresponding new feature in the list. These may be in new feature groups or in an existing feature group. These new features won't be selected for any roles.
When a new feature is added to an existing feature group, the checkbox at the feature group level will not be selected. All existing features within that feature group remain selected for the relevant roles.
Once you have upgraded, make sure you select the required new features for all your the relevant roles.
To authorise features for roles
Open: System Administration > Roles.
- Right-click the Role Name and choose Features.
- Choose another role from the Authorise For drop-down list, if required.
- Reduce the number of features shown by entering key words in the Feature Name box and clicking Filter.
- Choose your preferred view.
- Select Tree View to see system feature in tree view groups.
- Expand feature groups by clicking the
 (plus) symbol alongside the name.
 - Contract feature groups by clicking the
 (minus) symbol alongside the name.
 - Select Flat View to see all features in a flat view list.
-
Select the features you want to authorise for the role.
If a feature or feature group is selected there is a tick in the box alongside the feature or feature group.
-
Features that are authorised for a role are marked with a tick
 . Click the box to select or clear the feature.
 - If you select or clear a feature group box, all features within it are automatically selected or cleared. If you select or clear all features within a feature group the feature group box is automatically selected or cleared also.
- If you select or clear System Administration, to add or remove administration features for a role, enter your password to confirm that you have the authority to do this, and click OK.
-
- Click OK to confirm the features.