Once you've set up your stock items and entered an opening balance where applicable, you need to make sure your stock levels and locations are kept up to date.
Sage 200 manages this for you when stock items are bought and sold using sales and purchase orders, however there may be occasions when you need to move or update your stock levels manually.
When you enter any of these adjustments, a transaction is recorded in the stock history but these do not affect your nominal accounts.
Watch a video
Transfer stock between warehouses
Open: Stock Control > Enter Transactions > Adjustments > Transfer Stock
Here you move stock from warehouse to another or one bin to another. You simply choose the stock item and current warehouse and bin then choose the new warehouse and bin.
You can only move items to warehouses specified on the stock record. So if you need to move an item to somewhere entirely new, add the new warehouse to the stock record first.
![]()
Sage 200 checks the stock levels at both the current location and new location. You'll see a warning (the quantity is highlighted in yellow) if the you try to:
- Move more items that you have in stock or free stock at the current warehouse.
- Moving the items makes the stock level less than the re-order level or minimum stock level at the current warehouse.
- Moving the items makes the stock level more than maximum stock level at the new warehouse.
You can't move any stock items marked as Inactive.
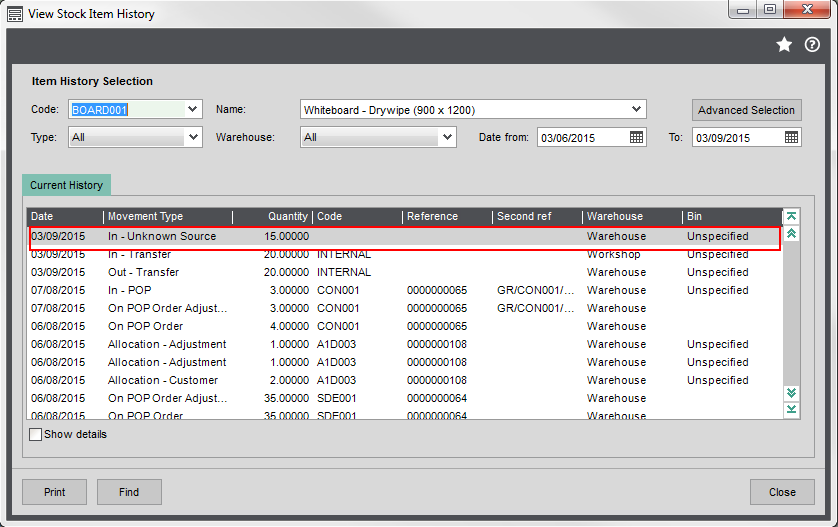
Once you've saved the stock transfer, a stock transaction is recorded showing the movement details. You can see this on the Stock History Enquiry screen.
![]()
Add stock
Open: Stock Control > Enter Transactions > Adjustments > Add Stock
You use this when you've found some stock in a warehouse that's not been recorded in Sage 200 and is not part of a normal stocktake.
When you add stock here, you also need to specify a cost price for it. This will default to the current average cost price of the item. Adding stock will update the last buying price for the item and will affect the item's average cost price.
You can see the transactions that have affected the cost price of any item on the View Buying Prices screen. This can be accessed from the Stock list.
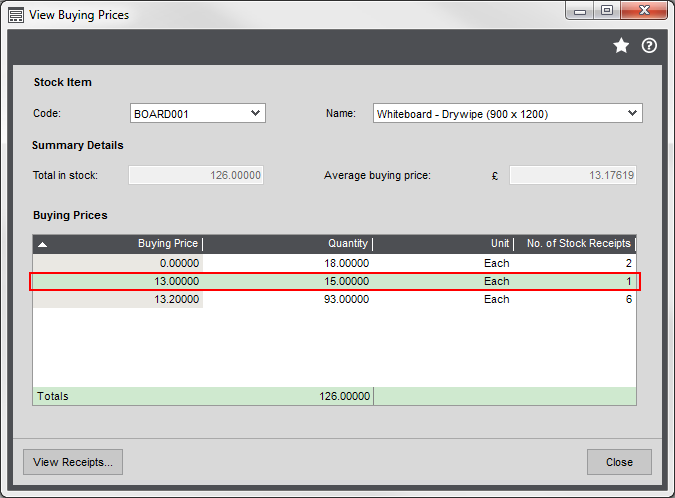
A stock transaction is also created in the Stock History.
Send stock back to a supplier to be repaired
Use this to record that an item that's been returned to a supplier for repair. You only use this when you're expecting to get the item sent back after repair. If the supplier is giving you a credit note or refund, create a Purchase Return for the item.
Sending items for repair has two stages:
-
Record the item as returned to the supplier.
This moves item to a Returns warehouse. This is controlled by Sage 200, so you can't access it, but you can see which items have been moved there using the Stock Status Enquiry or Stock Status report. These items can't be written off, sold or transferred.
-
Record the item as returned from supplier.
You do this when you get the repaired item back or get a replacement. Here you move the item back to its warehouse. You can only do this for items that have already been recorded as sent back to this supplier.
Three transactions are created in the Stock History for the movement in and out of the Returns warehouse and back into its usual warehouse.

-
To send to stock item to the supplier:
Open: Stock Control > Enter Transactions > Issues > Return to Supplier
-
To record receiving the repaired item back:
Open: Stock Control > Enter Transactions > Returns > Return from Supplier
Issue stock to an internal area
Use this to record when an item is being used by another area or department in your company. For example, your sales team might need use some stock for a demo. An internal area represents the department you are allocating the stock to.
You can record when items are removed from stock to be used internally and you can reserve some stock to prevent it being sold.
- Create your internal areas, if you haven't already. A single default Internal area is created for you.
- To reserve an item, but don't remove it from stock, use the Internal Allocation screen. This reduces the free stock for this item at the warehouse.
- To remove a reserved item from stock, use the Issue Allocation screen. This removes previously reserved items from the warehouse, and reduces the stock at the warehouse.
- To record an item as being used by an internal area, without reserving it first, use the Internal Issue screen. This reduces the stock at the warehouse.
- If the item is returned once it's finished with, use the Internal Return screen. This increases the stock at the warehouse.
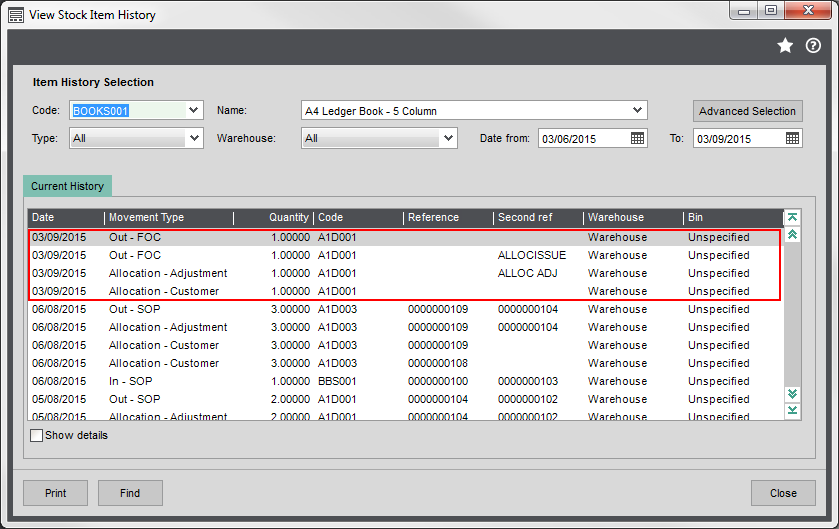
These transactions are recorded in the stock history for the item.

-
To issue the stock:
Stock Control > Enter Transactions > Issues > Internal Issue
-
To reserve or allocate the stock:
Stock Control > Enter Transactions > Allocations > Internal Allocation
-
To issues reserved stock:
Stock Control > Enter Transactions > Allocations > Issue Allocation
-
To record stock returned:
Stock Control > Enter Transactions > Returns > Internal Return
Issue stock to customer free of charge
Use this to record sending an item to a customer without charging them. You can record when items are sent to the customer without charge and you can reserve some stock to prevent it being sold.
- To reserve an item for a customer without removing it from stock, use the Customer Allocation screen. This reduces the free stock for this item at the warehouse.
- To remove a reserved item from stock, use the Issue Allocation screen. This removes previously reserved items from the warehouse, and reduces the stock at the warehouse.
- To record an item as being sent to a customer without reserving it first, use the Customer Issue screen. This reduces the stock at the warehouse.
These transaction are recorded in the stock history for the item.
-
To issue the stock:
Open: Stock Control > Enter Transactions > Issues > Customer FOC Issue
-
To reserve or allocate the stock
Open: Stock Control > Enter Transactions > Allocations > Customer Allocation
-
To issue reserved stock
Open: Stock Control > Enter Transactions > Allocations > Issue Allocation
Write Off Stock
Use this when you need to write off some stock and account for this a loss, such as when stock is damaged or obsolete.
If you want to record why stock is being written off, you can do this by creating additional write off categories. Once created, you can select the appropriate one from the Write Off Category drop-down list. This code then shows on the stock history.
-
To create write off categories:
Open: Settings > Stock Control > Stock Control Settings | Write Off Categories.
-
To write off stock:
Open: Stock Control > Enter Transactions > Adjustments > Write Off Stock
See Write off stock.